Adding and Editing a Post
Creating a New Blog Post Using The Block Editor
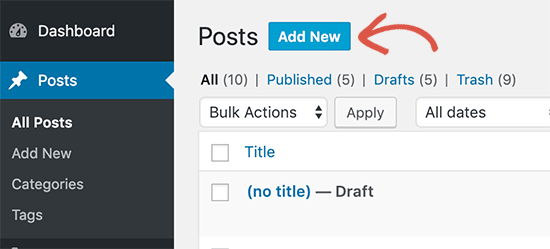
To create a new post, simply click on the Posts » Add New menu item in your WordPress admin.
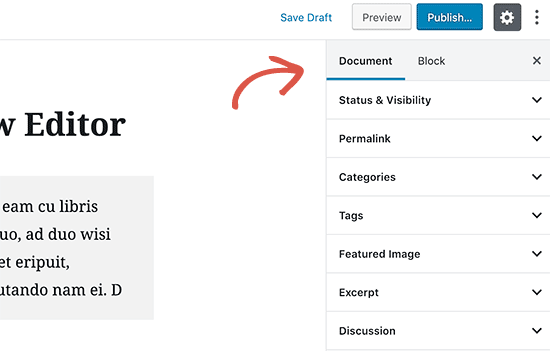
This will launch the new block editor.
WordPress Editor
The WordPress Editor is a new publishing experience. You can use it to create media-rich pages and posts and to control their layout with ease. Instead of worrying about the alignment and organization of text, quotes, and images, every element on a post or page has its own block — and you can focus on creating.
Move, edit, and customize each block, and the editor will display visual elements the way they’ll look on your actual site. You can confirm that via the Preview button before you hit “Publish”.
The Editor’s Workspace
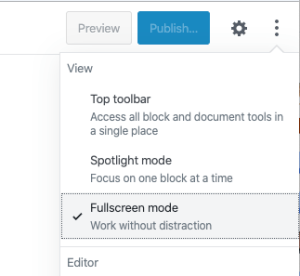
With the latest release of WordPress, the block editor opens by default in Fullscreen mode when you “Add new post or page”.

How to access the Admin Menu?
To access the Admin Menu, click on the WordPress logo on the top, note that this will make you leave the post or page.

How to switch-off Fullscreen mode?
To switch-off Fullscreen mode, use the 3-dot menu on the top right and un-check Fullscreen Mode.
Your choice will be stored in your browser’s local storage. If you switch browsers the choice for the view won’t be available and you have to set your preference again. The same is true when you switch computers.
How Does the Block editor Work?
Blocks
The WordPress Editor uses blocks to transform the way you create content: it turns a single document into a collection of discrete elements with explicit, easy-to-tweak structure.
The Block editor brings you an effortless page- and post-building experience. With blocks, you can quickly add and customize multiple media and visual elements that used to require shortcodes, custom HTML code, and embeds.
The Anatomy of a Block
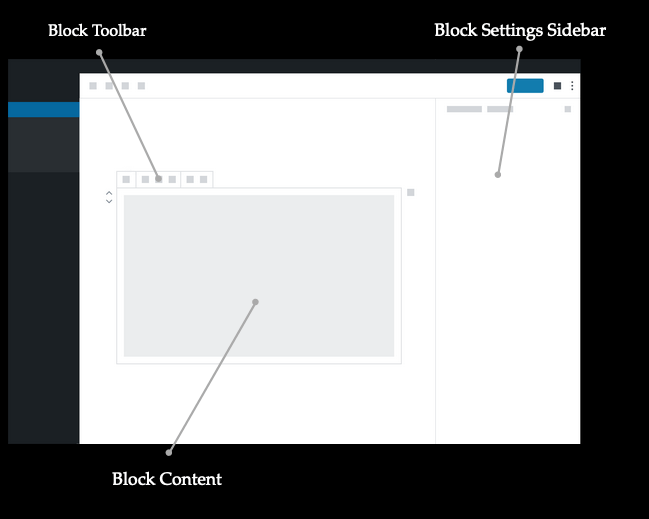
Each block consists of a Block Toolbar, a Block Settings Sidebar and the Block Content. Depending on the block’s purpose the buttons of the Block Toolbar will change and so will be settings items in the Block settings sidebar. All the core blocks are divided into three sections: Description in how a block works, and the items in the Block Tools and what you can change in the Block Settings Sidebar.
Adding a Block
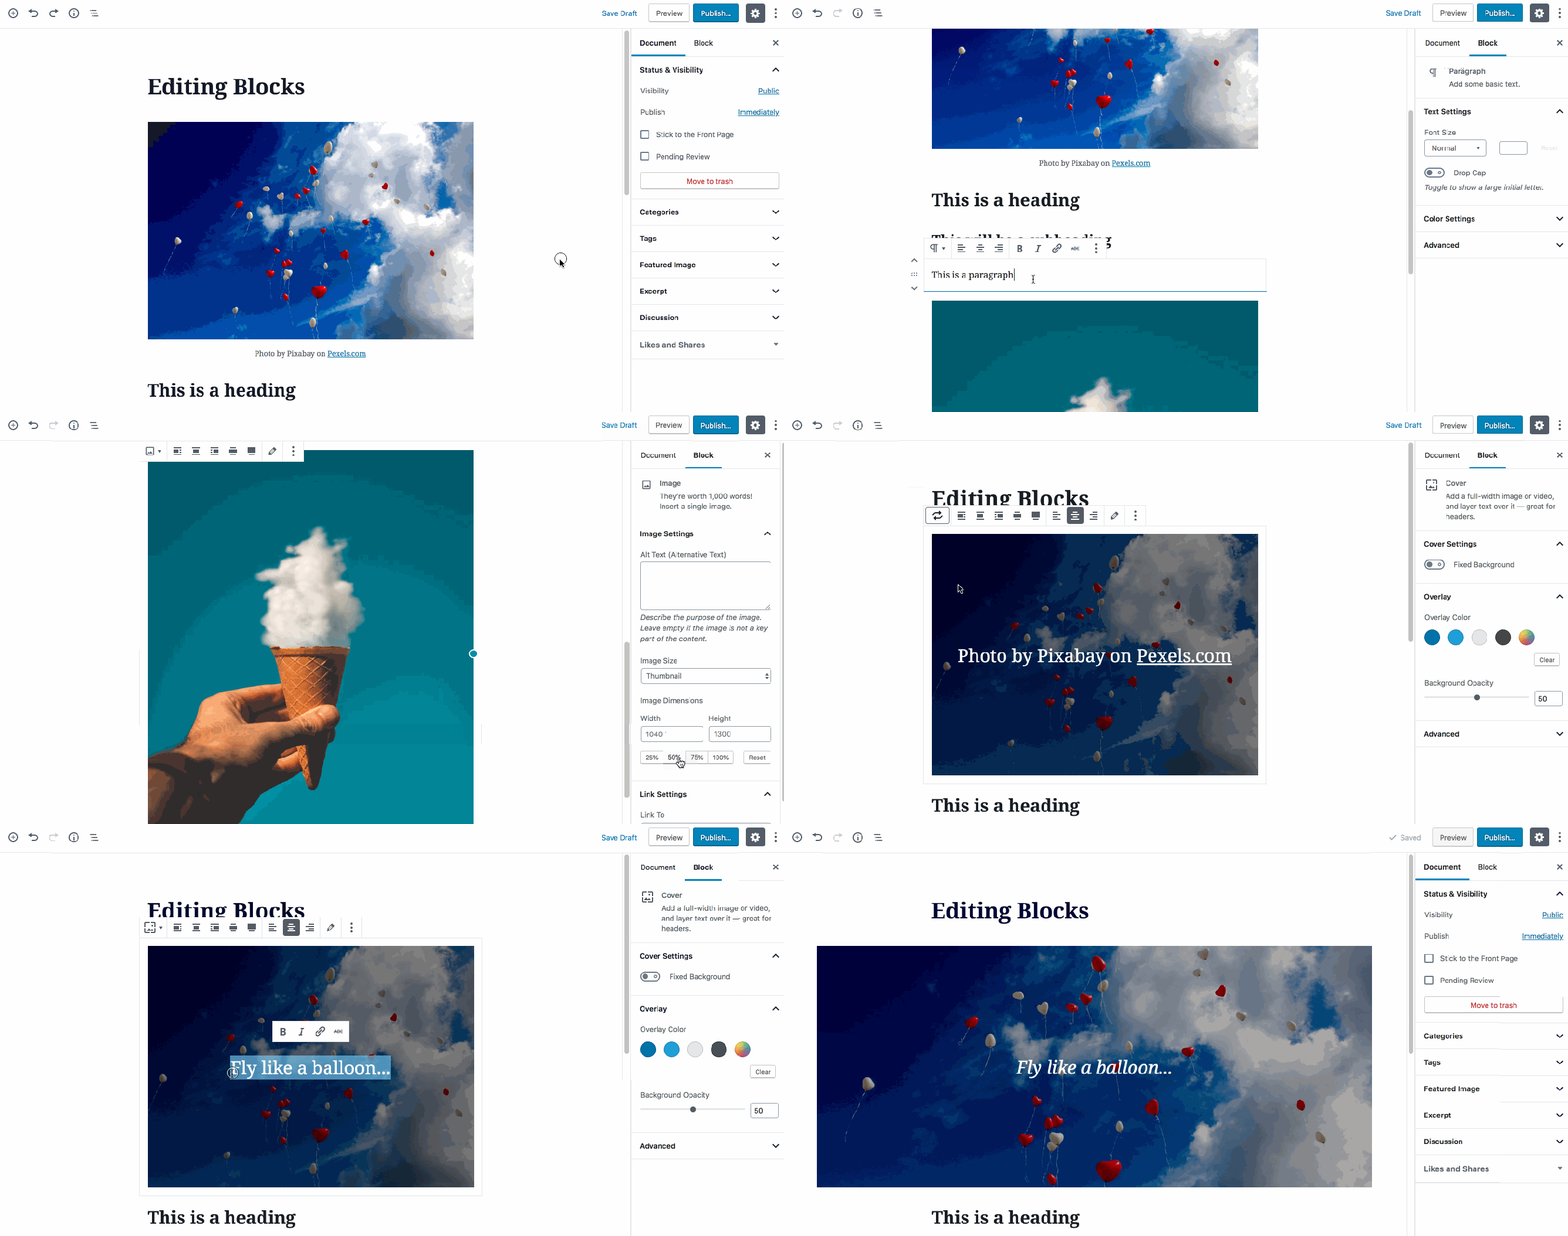
There are many block types for you to choose from, which you’ll see organized by category and by most recent use. You can edit or move each block independently of other blocks, and individual blocks sometimes come with their own formatting settings for even greater control over layout and function.
Configuring a Block
Each block has its own settings. To find them, select a block: this will reveal a toolbar at the top of the block. You’ll also find additional settings in the sidebar to the right of the editor.
The settings at the top of the block usually include formatting options as well as the option to change the block type ([1] in screenshot below).
In the editor’s sidebar you can switch between settings for the current block ([2] in screenshot below) and settings for the whole document ([3] in screenshot below).
The Document Settings is where you can add tags and categories, choose a featured image, see and change the status of your post, and more — these are options that apply to the page or post as a whole.
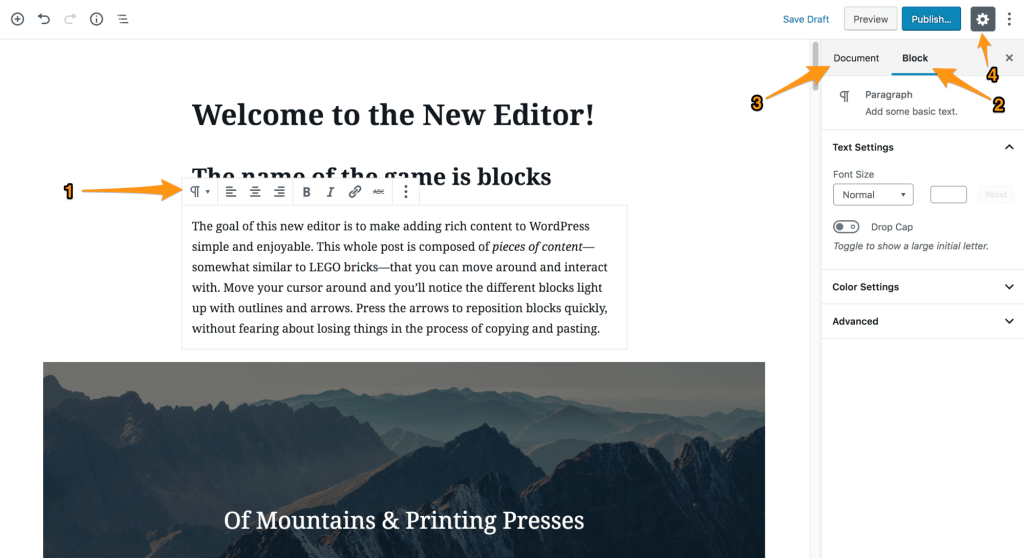
You can click the cog icon at the top right of the editor to show or hide the settings column ([4] in screenshot above).
What if you’d like to change a block type? No problem: you can transform each block to another similar or related block type. For example, change a paragraph to a heading, a list, or a quote.
Removing a Block
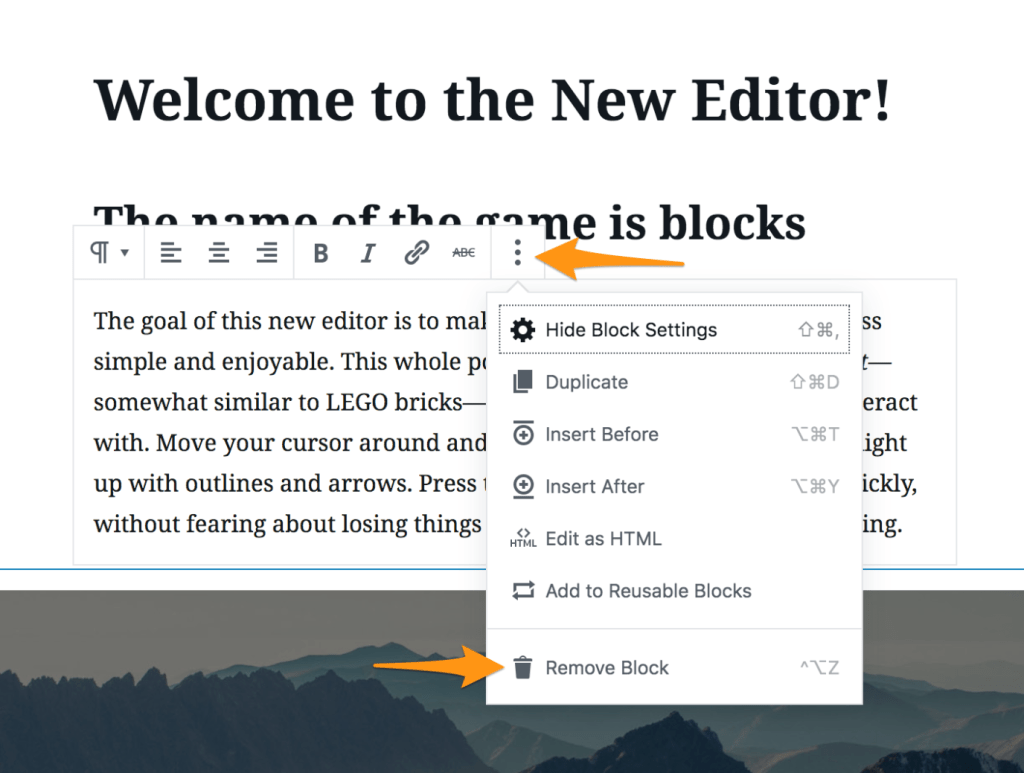
To remove a block, select the block and click the three dots right above it. Among the settings there you’ll see the option to remove that block.
Publishing Your Post
To publish your post, click on the blue Publish button in the top right corner of your screen. You also have options to schedule your post or save it as a draft. All these options are neatly placed in the right column on the editor screen.
